- HR:+91-879-9184-787
- Sales:+91-908-163-7774

In 2024, it is a no-brainer to select Node JS for all the backend projects due to its ease of access and efficiency. As a beginner in MacOS you must be wondering how to install node JS on Mac, isn’t it? Well, we have got you covered. In this article, we will understand the process of installing Node JS on your Mac machine step-by-step.
In recent years, Node.js has become a cornerstone of modern web development, powering everything from simple server-side applications to complex real-time systems. Its popularity stems from its versatility and the vibrant ecosystem of packages and tools available through npm, the Node.js package manager.
Whether you’re into a web development project, exploring server-side scripting, or starting on a journey into full-stack application development, mastering Node.js is essential.
So, let’s understand how to install node js on Mac without further ado!
Node.js, often referred to simply as Node, is an open-source, cross-platform JavaScript runtime environment that allows developers to run JavaScript code outside of a web browser. It’s built on the Chrome V8 JavaScript engine, providing a fast and efficient runtime for executing JavaScript code. Node.js enables developers to build scalable and high-performance applications, particularly on the server side. With its event-driven architecture and non-blocking I/O model, Node.js is well-suited for handling asynchronous operations, making it ideal for building real-time web applications, APIs, and microservices.
Additionally, Node.js comes with a vast ecosystem of modules and packages available through npm, the Node.js package manager, which further enhances its versatility and productivity for developers. Overall, Node.js empowers developers to write JavaScript code for both frontend and backend development, streamlining the development process and fostering code reusability across different layers of a web application.

Installing Node for Mac machines opens up a world of possibilities for building scalable and efficient applications. Whether you’re working on web development, networking tools, or IoT projects, Node.js provides the tools and capabilities you need.
Here’s a detailed explanation of why you should go for Mac install node:
Node.js allows you to write JavaScript code that can run on both the server side and the client side. It means a developer can use the same language and skill set to develop both backend and frontend components of the applications which streamlines the development process and improves code consistency.
Node.js boasts a vast ecosystem of modules and packages available through npm, the Node.js package manager. These packages cover a wide range of functionalities, from simple utilities to complex frameworks. It results in integrating third-party libraries and tools into ongoing projects with ease. Whether you need to add authentication, database connectivity, or any other feature to your application, there’s an npm package available to help you do it anytime.
Node.js is known for its ability to handle high concurrency and large numbers of simultaneous connections. It is well-suited for building scalable and real-time applications. Its event-driven, non-blocking I/O model allows Node.js applications to efficiently handle asynchronous operations and ensure optimal performance even under heavy loads.
With Node.js, you can quickly prototype and iterate on your ideas thanks to its lightweight and AGILE development environment on mac install node. The ability to run JavaScript code outside of a web browser means you can test your server-side logic without needing to set up a separate server environment which reduces the development time and speeds up the feedback loop.
Node.js has a large and active community of developers who contribute to its development, create tutorials, share best practices, and provide support through forums and online communities. This wealth of resources makes it easy to find help and learn new skills as you dive deeper into Node.js development.
Node.js keeps pace with the latest advancements in web technologies which ensures compatibility with modern frameworks, libraries, and standards. Whether you’re working with React, Angular, Vue.js, or any other frontend framework, Node.js provides a solid foundation for building modern web applications.
“Node JS vs React: A Detailed Comparison You Must Consider”
Before we dive into the node js install process, there are a few prerequisites you must consider while installing Node for Mac:
Node JS install on Mac devices can be done with the below-mentioned steps:
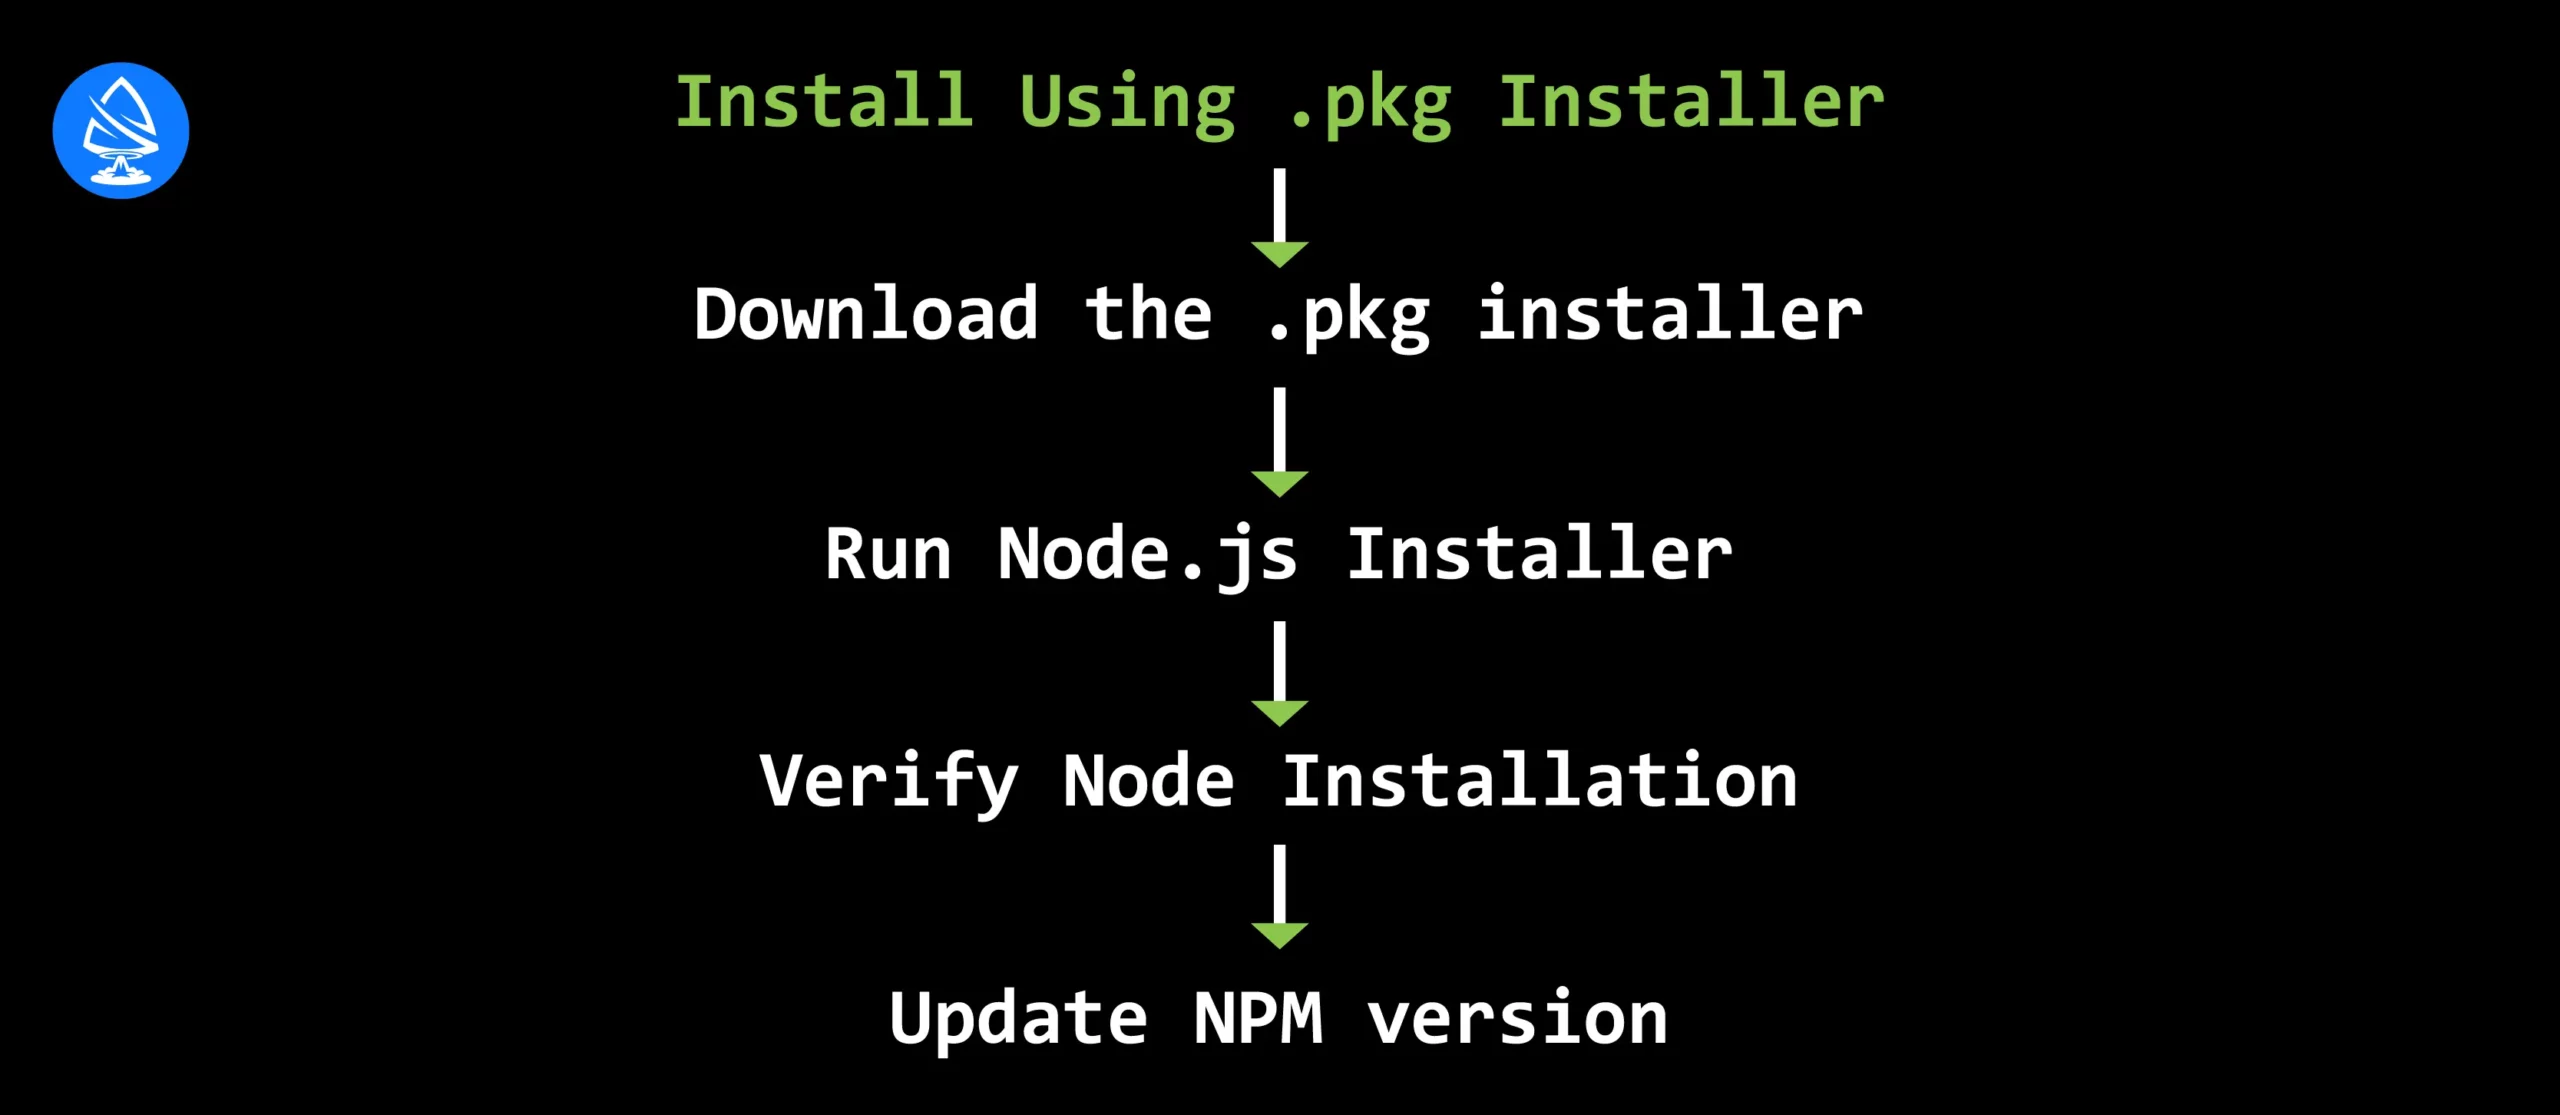
Select the “macOS Installer” option to initiate the download of the .pkg installer file. Ensure that you save the file to your preferred location.
Your installer is now prepared for execution. However, the process will not consume much of your time. Let’s understand this in detail.
| Introduction > Continue License > Click on Continue > Agree Installation Type > Install > Authenticate with your Mac to allow the Installation > Install Software Summary > Close |
To confirm the successful Node installation on your macOS system, execute the following command in your terminal:
| node -v //This command checks the version of the nodejs |
Node.js does not update the npm version automatically.
Execute the provided command to update your npm version.
| $ sudo npm install npm –global //Update the npm CLI client |
Boom! Node.js is installed on your system. Sounds interesting, isn’t it? Let’s move it further.
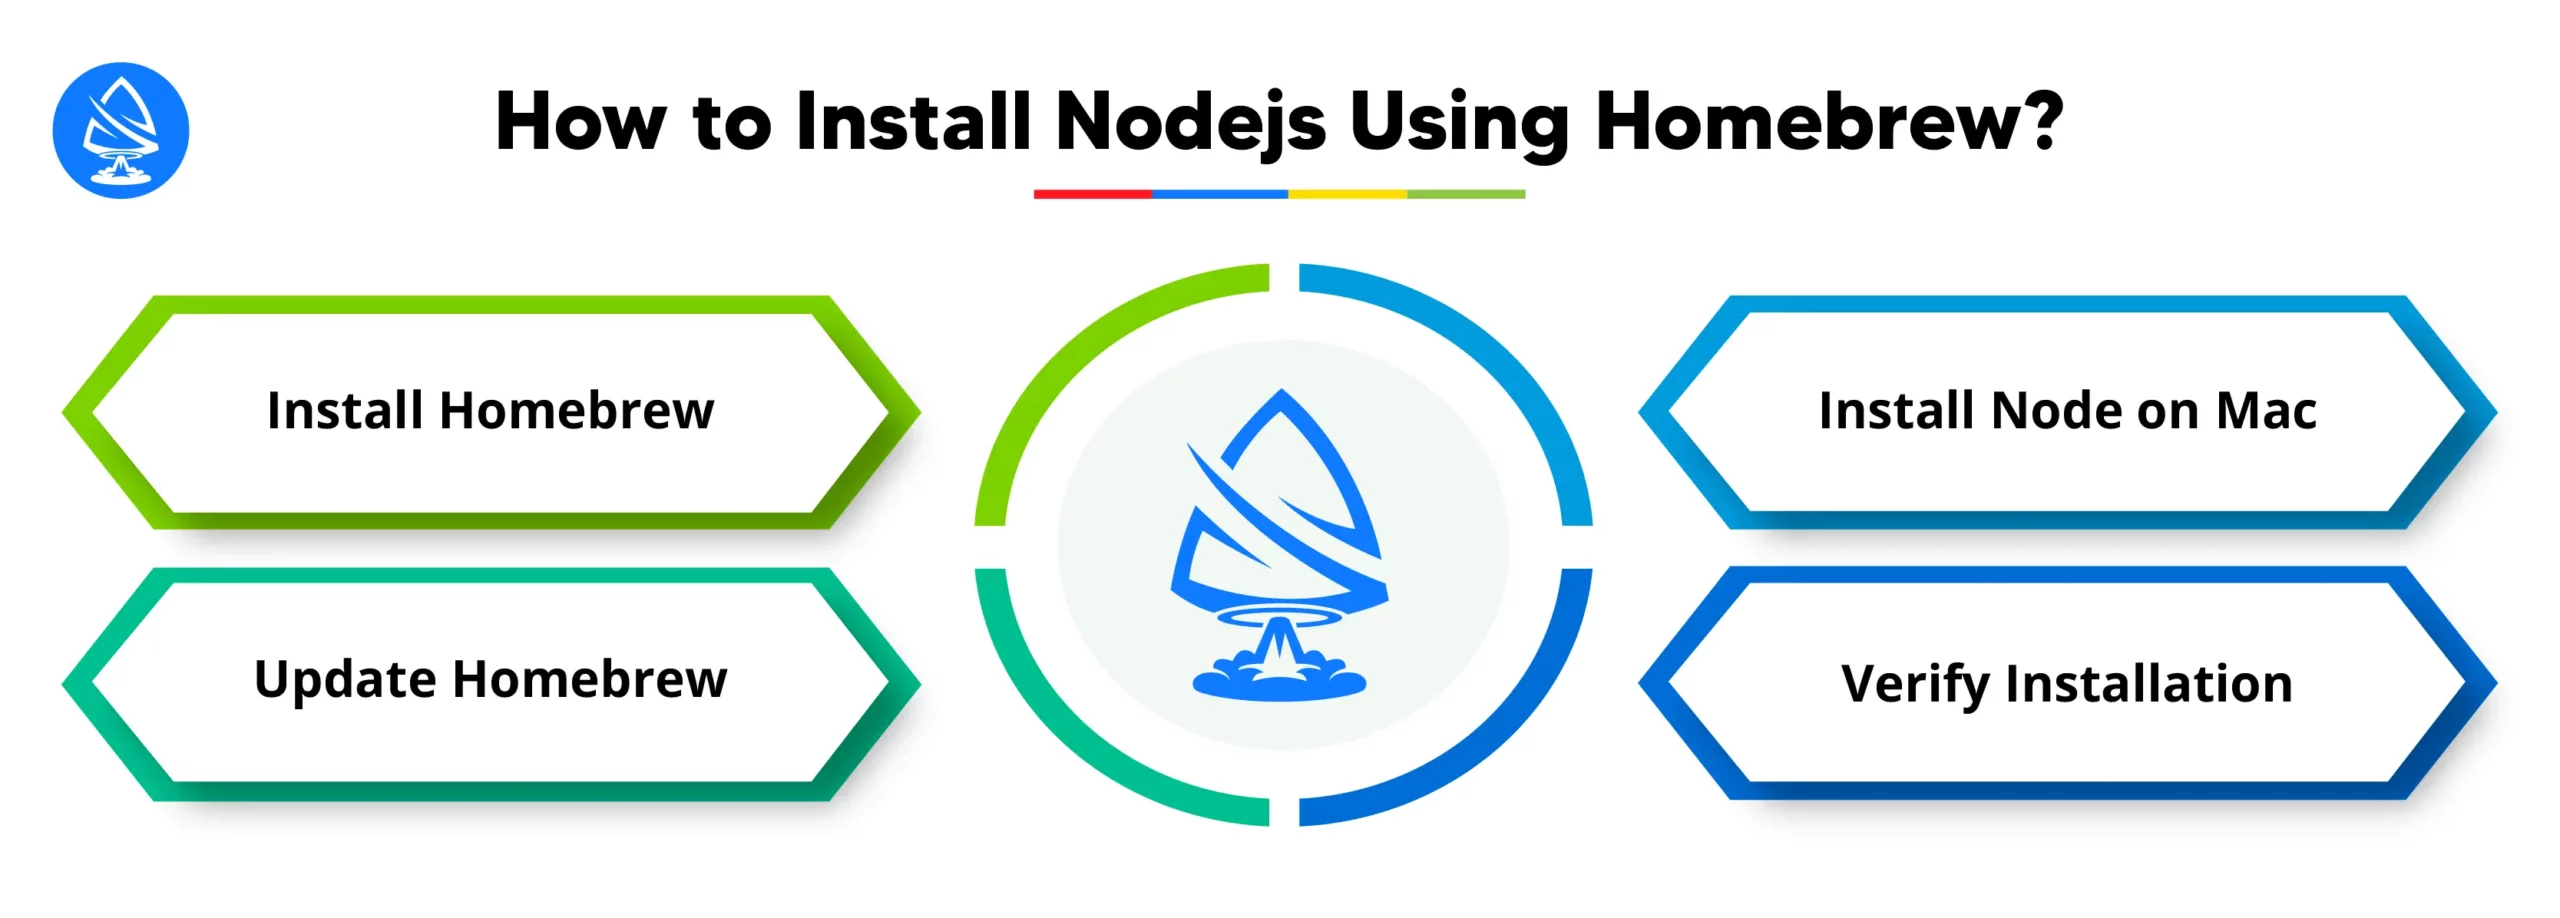
Homebrew, a free and open-source software package management system, handles the Node installation process on macOS and Linux. It places packages into their designated directories and their associated files within /usr/local .
Here’s how you can install Node JS on macOS using Homebrew. Follow these steps:
| /bin/bash -c “$(curl -fsSL https://raw.githubusercontent.com/Homebrew/install/HEAD/install.sh)” |
| brew update |
| brew install node |
| node -v npm -v |
These commands should display the installed versions of Node.js and npm, respectively.
“What are the steps to update Node JS? Explained in Detail”

Troubleshooting Node.js installation issues on Mac involves identifying and resolving common problems that may arise during the installation process. Here’s a detailed explanation of the troubleshooting steps:
| brew cleanup |
Read More: What are Node js Command Line Arguments?”
Uninstalling Node.js from a Mac can be done using several methods. Here are a few options:
| brew uninstall node |
| sudo rm -rf /usr/local/{lib/node{,/.npm,_modules},bin,share/man}/{npm*,node*,man1/node*} |
| sudo rm -rf /usr/local/lib/node_modules/npm |
You can list them using:
| npm list -g –depth=0 |
And then manually remove each package you want to uninstall.
| node -v npm -v |
These commands should return an error indicating that the commands are not found, which confirms the removal.
As a leading Nodejs development company serving clients in the USA, Artoon Solutions prioritizes not only the implementation of cutting-edge solutions but also the seamless management of software environments. Understanding the importance of a clean and efficient development ecosystem, we recognize the significance of proper installation and removal procedures for Node.js.
Whether it’s crafting innovative applications or ensuring a smooth uninstallation process, our team at Artoon Solutions remains committed to delivering top-notch Nodejs development services designed to meet the diverse needs of our clients.
Hire Nodejs developers from Artoon Solutions now!
Yes, you can manage multiple versions of Node.js on your Mac using tools like nvm (Node Version Manager). This allows you to switch between different Node.js versions based on your project requirements.
It is recommended to update Node.js regularly to ensure you have the latest features, security patches, and performance improvements. Keeping Node.js up to date also helps prevent compatibility issues with your projects.
Installing Node.js on your Mac should not have any adverse effects on other applications. Node.js runs independently and does not interfere with system applications or services.
If you encounter permission errors during the installation process, try running the installation commands with elevated privileges using `sudo`. However, be cautious when using `sudo` as it grants extensive permissions and should be used judiciously.
It is not mandatory to uninstall Node.js before updating to a newer version on Mac using Homebrew. Homebrew handles the update process seamlessly, ensuring that the new version is installed correctly while maintaining compatibility with your existing projects.
Artoon Solutions
Artoon Solutions is a technology company that specializes in providing a wide range of IT services, including web and mobile app development, game development, and web application development. They offer custom software solutions to clients across various industries and are known for their expertise in technologies such as React.js, Angular, Node.js, and others. The company focuses on delivering high-quality, innovative solutions tailored to meet the specific needs of their clients.
Copyright 2009-2025